Step by step
- Click “New Post” in the left menu and choose the image type. “Text + AI Image” creates the image from scratch (1 action and 30 credits). “Text + Your Image” uses a photo of yours, which the AI adjusts and fits into the post (1 action and 10 credits).
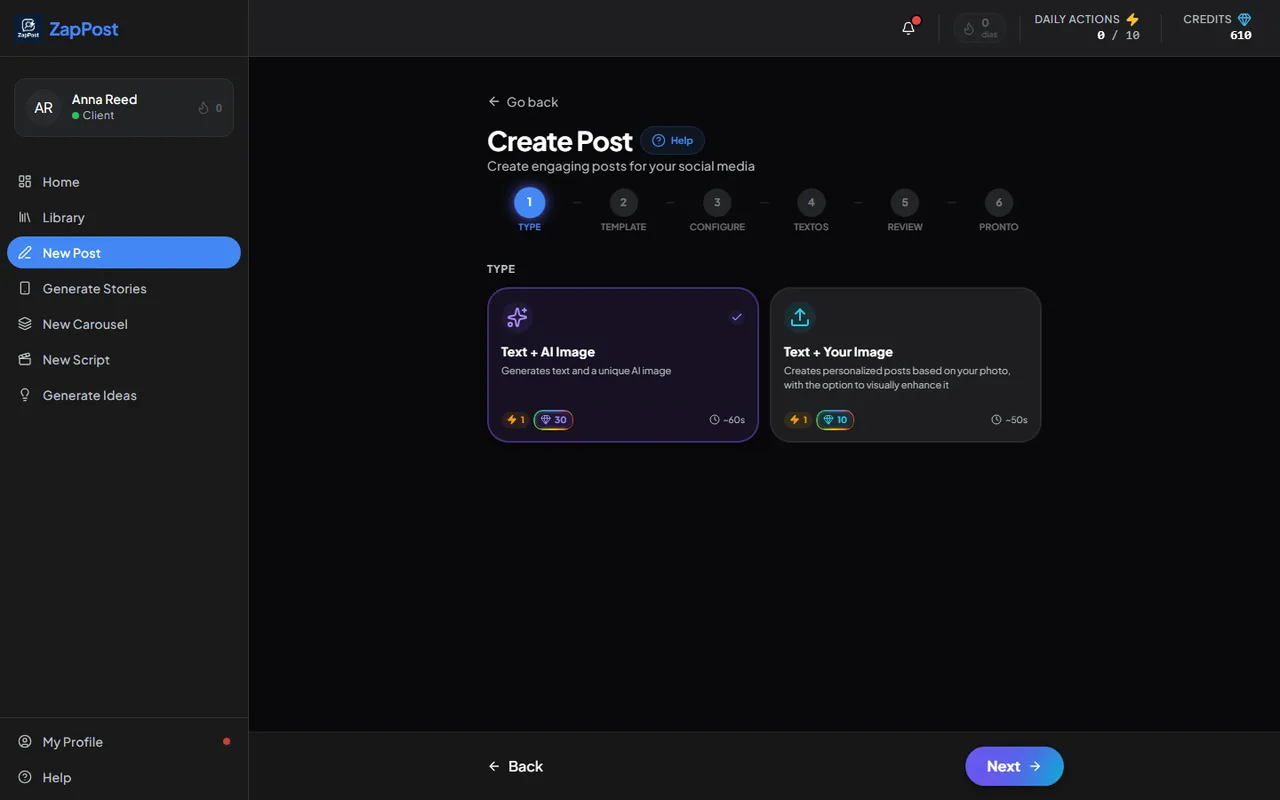
The first step: the image type. Under each option is what it costs. - Choose the template, which is the design of the image: social media card, notes block, chat conversation, newspaper headline, checklist, quote, among others.
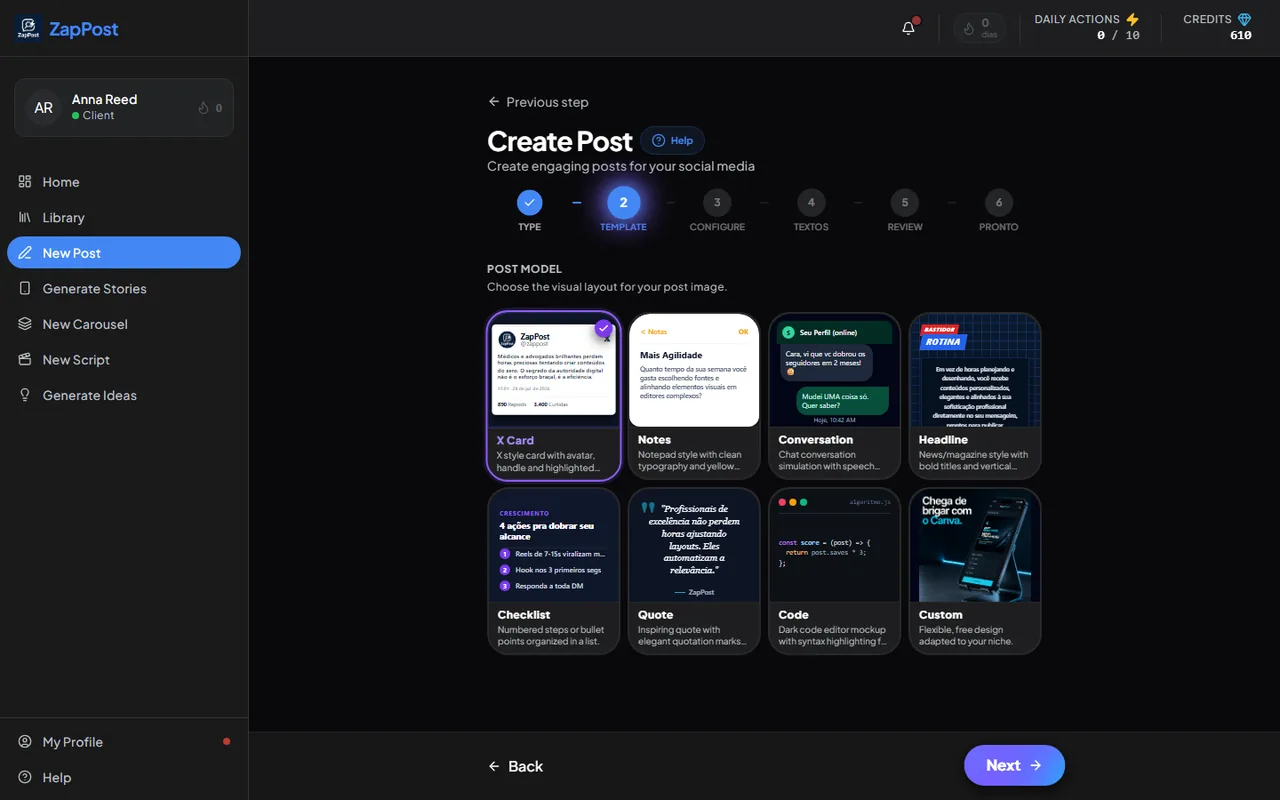
The second step: the visual template of the post. - Say the topic in the “AI Instructions” field. One sentence is enough: “Mother’s Day promotion at my salon, 30% off hydration”. The more context, the better the result. No idea? Turn on Magic Mode and the AI picks the topic from your profile.
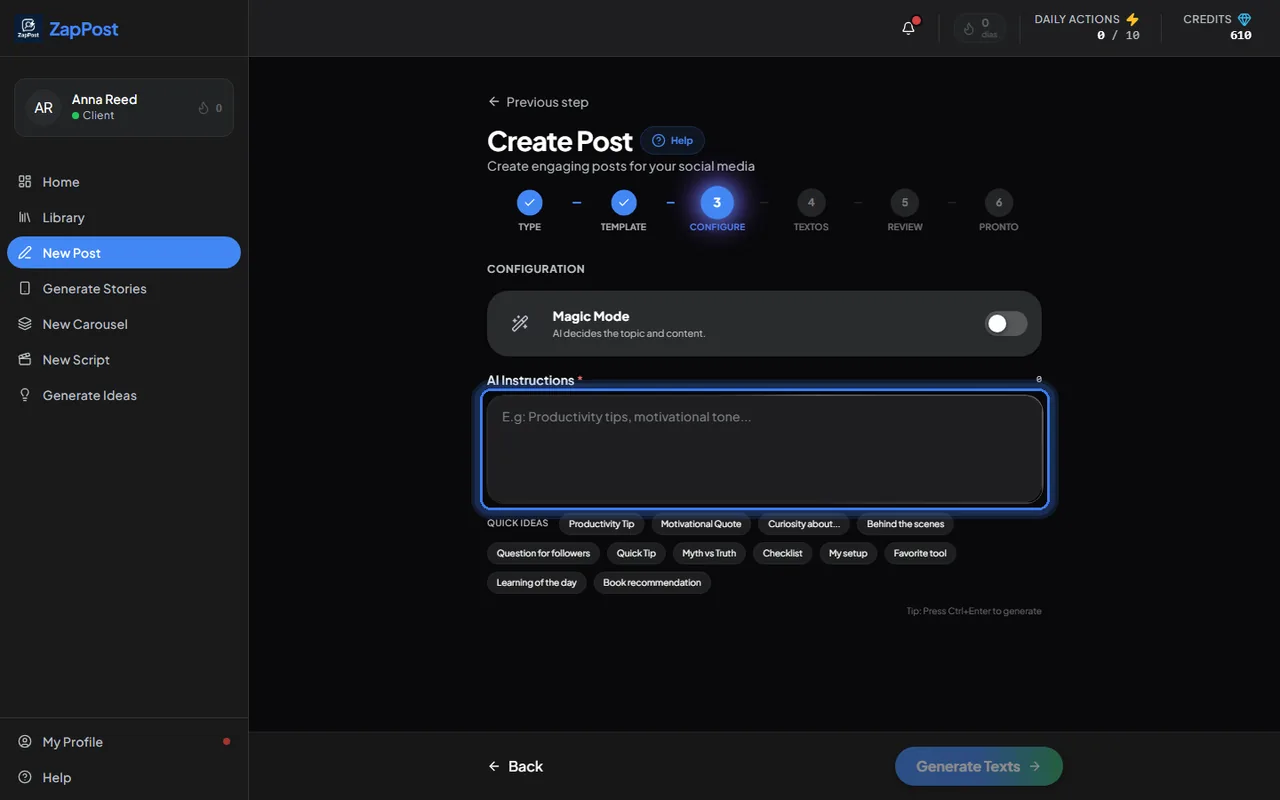
The third step: the topic of the post. The suggestions under the field fill it in for you. - Click “Generate Texts” and wait a few seconds. The AI shows the caption for you to review and change whatever you want.
- Review the image and finish. In the last step the post is ready to copy the caption and download the image.
What comes in the caption
- Hook: the first line, the one that makes someone stop scrolling and read.
- Body: the content itself, written in your profile’s tone of voice.
- CTA: the closing call (comment, send a DM, tap the link in bio), according to the objective you set in the profile.
- Emojis, line breaks and hashtags for your niche, ready to paste into Instagram.
When to use your photo
When the post is about your space, your product or yourself. The AI image gets the mood of the business right, but it is not a photo of your salon. With “Text + Your Image” the post comes out with your real photo, and costs fewer credits.
Everything that comes out of here stays in the Library and can be edited later. See also can I edit the generated content.
Answer checked on 31 August 2026.